February 14, 2024
How to sync SharePoint lists to Airtable via Power Automate
Introduction
Airtable includes a number of prebuilt "sync connectors" which allow data to be brought into Airtable from outside sources: Airtable Sync
However, as of the writing of this article, no sync integration exists with Microsoft SharePoint (a.k.a Microsoft Lists). Since SharePoint Lists are used extensively for data at work, we’ve developed a standardized process to sync data from SharePoint to Airtable, using Microsoft Power Automate and the "Sync Emailed Data" sync connector.
Limitations I am aware of
- File attachments cannot be synced from SharePoint to Airtable
- A maximum of 10,000 rows can be synced
- Developers must ensure that the CSV files sent are less than 5MB.
- If the SharePoint List structure is changed by adding columns or modifying column types, these changes will not be picked up automatically. The developer of the integration must manually update the Flow in Power Automate.
Instructions
- Create a new Flow in Power Automate.
- As a trigger, use "Schedule". Set the recurrence to any interval you like.
- Add an action, "Get Items" in the SharePoint app.
- Locate the Site and List you wish to sync.
- In the "Advanced Parameters", select the checkbox by "Top Count"
- Enter 10000 as the value of "Top Count"
- If this is not entered, only 100 items will be returned
- At this point, it is good to save and select "Test" on the top right. This will pull in data from SharePoint which can be used to populate subsequent steps.
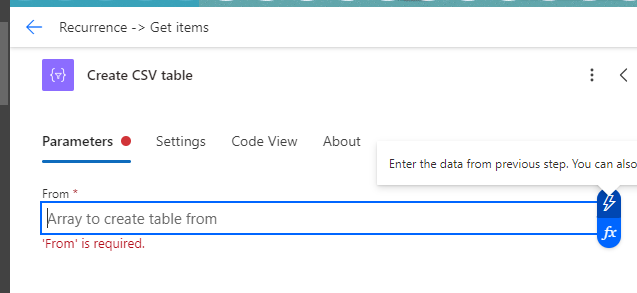
- Now, add another action, using the "Create CSV Table" option in the "Data Operation" app.
- Click your mouse on "Array to create table from" field, and select the lightning bolt icon to add data from a previous step.

- Select the "body/value" from the previous "Get Items" step

- Next to "Advanced Parameters", select "Show all"
- Under the "Columns" dropdown select "Custom"
- This is necessary because, unfortunately, the "Automatic" option in "Columns" does not work (it would be nice!). The "Automatic" option provides XML-formatted data instead of merely including values for columns.
- You will now have the opportunity to manually map columns from the SharePoint list to columns in a CSV. This should be straightforward. In each "Header", type the name of the column, and in each "Value", use the lightning bolt to select the value of this column from the "Get Items" step. Some additional notes:
- The first column of the CSV should be the unique human readable name of the item, as in Airtable the first column is displayed as the title of the record in many scenarios such as linking records.
- Be sure to include the ID of the SharePoint item, as Airtable will request a unique identifier to deduplicate incoming records and link existing records to new CSV files received.

- Once all columns are mapped, add another action, "Send an email (V2)" in Microsoft Outlook
- For now, you can add your own email in the "To", or simply put a fake email like "example@example.com"
- Since Power Automate requires a subject and body, enter any subject and body you like
- Under "Advanced Parameters", check the checkbox next to "Attachments"
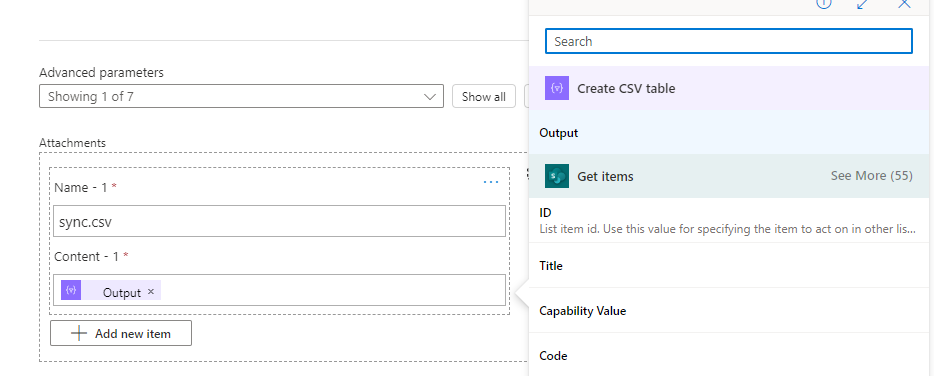
- In the "Attachments" area you just added, select "Add new item"

- In "Name - 1" enter a csv filename, such as sync.csv
- In "Content - 1" select the lightning bolt and select "Output" from the "Create CSV table" step

- You can test once again at this step, to make sure everything is working well
- Now, go to the Airtable base you wish to sync the data to
- Follow the instructions at Airtable Sync Integration Emailed Data to get an email address which can receive your synced data
- Enter this email address into the "Send an email (V2)" step of your Flow in Power Automate, and test again. Wait until Airtable acknowledges receipt of the file
- For the "Primary field" (the field which will appear first in Airtable) use the item’s title in SharePoint
- For the "Unique identifier" (the field which Airtable will use to recognize whether a row in the CSV is new or existed previously) use the SharePoint item ID.
- Check each other column’s type to ensure that Airtable guessed the type of column correctly. In particular, be careful that if Airtable turned a text column with hundreds+ of unique values into a single select column type (with colored options) return to a text column, as otherwise this results in terrible slowdowns in Airtable.
- At this point, Airtable is ready to sync! You can turn on your Flow in Power Automate and it will run as often as you requested.
Sincerely,
David Smedberg